
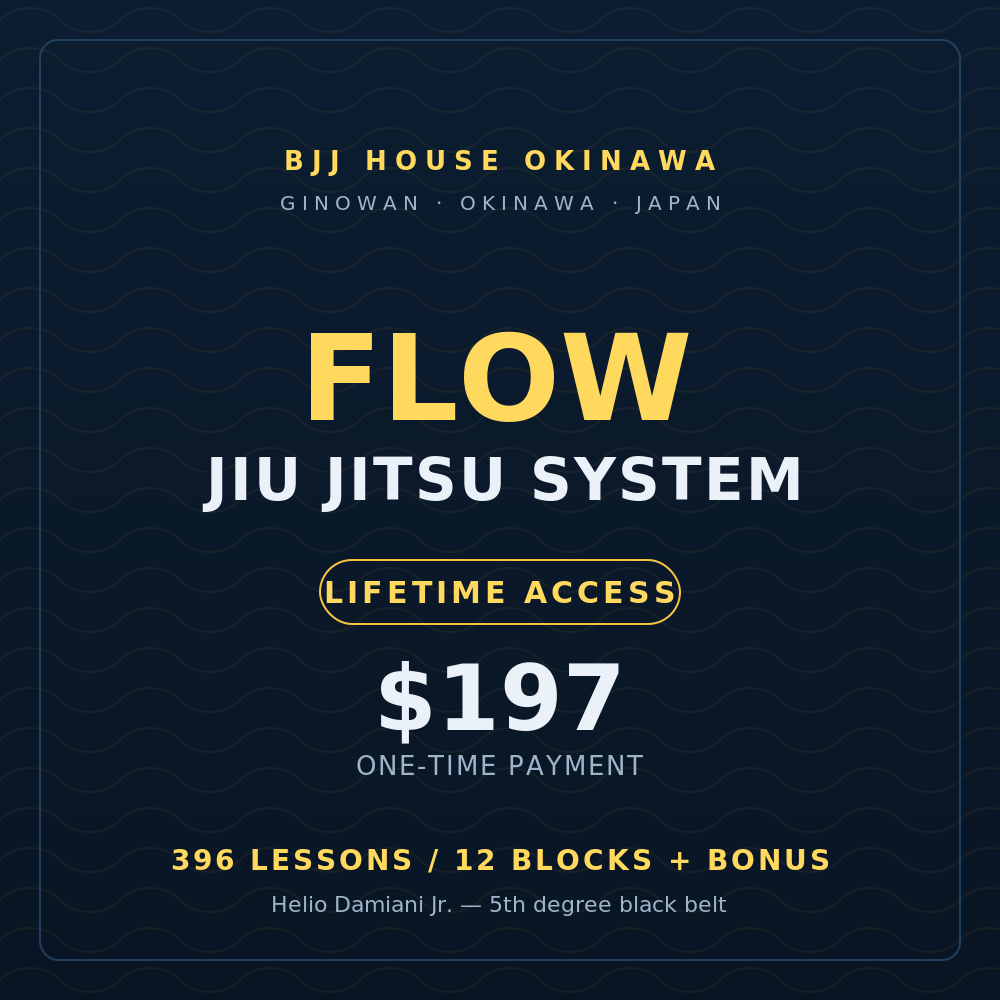
Course Content
Start Here
Comece por aqui — a ideia por trás do Flow Jiu Jitsu System.
-
The Idea Behind the System
00:00
Block 1A — Standup Curriculum (Concepts)
The 16 original standing-game concepts: kuzushi, grips, combinations, defense, frames, pull guard and more.
-
Off-Balance Him First — Kuzushi
00:00 -
Win The Grip Fight Before The Fight
00:00 -
Chain Your Stand-Up Attacks
00:00 -
Dynamic Stand-Up Combinations
00:00 -
Footwork That Flows Like A Dance
00:00 -
Stay Light On Your Feet
00:00 -
Make The Stand-Up Game Fun
00:00 -
How To Train Your Stand-Up Smarter
00:00 -
Attack In Combinations
00:00 -
Use The Wall To Your Advantage
00:00 -
Shut Down The Takedown
00:00 -
Defensive Grips That Stop Him Cold
00:00 -
Frame To Stay Safe Standing
00:00 -
Pull Guard The Right Way
00:00 -
Guillotine Off The Guard Pull
02:44 -
The Aggressive Guard Pull
00:00 -
One-Grip Guard Pull
00:00
Block 1B — Standup Fundamentals
Standing-game fundamentals — grip control, safe takedowns, arm drag, pull guard, self-defense and throws.
-
Stand-Up Grip Control Fundamentals
00:00 -
Safe Takedowns For BJJ
00:00 -
Arm Drag & Collar Drag System
11:03 -
The Pull Guard System: When & How
00:00 -
Stand-Up Self-Defense — Full Class
16:19 -
Hip Throw Concepts & Entries
11:59 -
Sharpen Your Standing Game — Drills
10:38 -
The Standing Headlock System
17:02 -
Belt Test – Stand Up
Block 2A — Closed Guard Curriculum (Concepts)
The 30 closed guard concepts: distance, frames, arm attacks, sweeps, back takes and submissions.
-
Closed Guard — Where It All Starts
00:00 -
Control The Distance In Closed Guard
00:00 -
Foot On The Hip — Closed Guard Control
00:00 -
Break His Posture Every Time
00:00 -
Change The Distance At Will
00:00 -
Find The Best Distance To Attack
00:00 -
Frame With Your Arms — Closed Guard
00:00 -
Trap The Arm, Own The Guard
00:00 -
Attack The Trapped Arm
00:00 -
Submissions From The Arm Trap
00:00 -
Closed Guard Review
00:00 -
The Closed Guard Armlock
00:00 -
High Closed Guard — Best Arm Control
00:00 -
The Power Of High Closed Guard
00:00 -
Dominate From Closed Guard
00:00 -
Take The Back From Closed Guard
00:00 -
The Pendulum Sweep
00:00 -
Change Directions To Sweep
00:00 -
Arm Drag Straight To The Triangle
00:00 -
Spot The Triangle (Sankaku) Opportunity
00:00 -
Three Attacks From Closed Guard
00:00 -
Taking The Back From Guard
00:00 -
The Scissor Sweep
00:00 -
Feel The Opportunity To Attack
00:00 -
The Closed Guard Collar Choke
00:00 -
Roll Your Hips To Sweep
00:00 -
The Flower Sweep
00:00 -
Connect Your Attacks
00:00 -
The Lapel Closed Guard
00:00 -
The Roleta Sweep
00:00
Block 2B — Closed Guard Fundamentals
Closed guard fundamentals: opening the guard, arm control, arm trap and the lapel system (full classes).
-
How To Open The Closed Guard — Full Class
00:00 -
Threaten The Stand-Up — Closed Guard Attacks
00:00 -
The Arm Control System — Full Class
00:00 -
The Arm Trap System — Full Class
00:00 -
Mastering The Lapel Closed Guard — Full Class 1
00:00 -
Lapel Closed Guard System — Full Class 2
00:00 -
Roleta Sweep From Lapel Guard — Full Class 3
00:00 -
K-Guard & Lapel — Full Class 4
00:00 -
Belt Test – Closed Guard
Block 3A — Pass Guard Curriculum (Concepts)
The 41 guard-passing concepts: pressure, knee cut, toreando, leg drag, long distance, foot lock and more.
-
Control The Hips To Pass
00:00 -
Ezequiel — Pass & Finish
00:00 -
The São Paulo Pass
00:00 -
The São Paulo Pass — Detailed Review
00:00 -
How To Train Passing Efficiently
00:00 -
Open The Closed Guard To Pass
00:00 -
The Close Pass
00:00 -
The Close Under Pass
00:00 -
The Stack Pass
00:00 -
The Double Under Pass
00:00 -
The Under-Over Pass
00:00 -
Under-Over Pass Variations
00:00 -
Break The Closed Guard Open
00:00 -
The Knee Cut Pass
00:00 -
The Knee Slice Pass
00:00 -
The Combination Pass
00:00 -
Passing The Knee Shield
00:00 -
Tripod Pass Variations
00:00 -
Leg Trap Passing
00:00 -
How To Use The Knee Shield
00:00 -
3 Ways To Pass The Knee Shield
00:00 -
The Long Step Pass
00:00 -
How To Open The Closed Guard
00:00 -
Open The Closed Guard Standing
00:00 -
Long Distance Passing
00:00 -
Control The Legs To Pass
00:00 -
Change Sides To Pass
00:00 -
The Toreando Pass
00:00 -
The Leg Drag Pass
00:00 -
Open Guard — Control The Legs
00:00 -
Long Distance Passing — Continued
00:00 -
Toreando To Shoulder Pass
00:00 -
Pass With Shoulder Pressure
00:00 -
Long Distance Pass Drill
00:00 -
Pass By Controlling The Hips
00:00 -
Long Distance Pass — Change Sides
00:00 -
The Open Guard Pass
00:00 -
3 Distances Pass Combination
00:00 -
The Best Way To Pass The Guard
00:00 -
The Foot Lock In The Guard
00:00 -
Finish The Foot Lock — Details
00:00
Block 3B — Passing Guard Full Class
Full passing classes: knee cut/leg weave, under-over, pressure pass and tripod.
-
Mastering Pass Guard — Concepts — Full Class
00:00 -
Knee Cut & Leg Weave System — Full Class 2
00:00 -
Under-Over Pass Study — Full Class 3
00:00 -
4 Pit Stops For Passing — Full Class 4
00:00 -
Pressure Passing — Full Class 1
00:00 -
Mastering Pressure Passing — Full Class 2
00:00 -
Tripod Pressure Pass — Full Class 3
00:00 -
Pressure Tripod To Floating Pass — Full Class 4
00:00 -
Belt Test – Guard Pass
Block 4A — Butterfly Guard Curriculum (Concepts)
The 29 butterfly guard concepts: hook mechanics, sweeps, shoulder control, arm attacks and transitions to X-guard.
-
Butterfly Hooks — The Mechanics
00:00 -
The Standing Hook Sweep
00:00 -
Elevation Hooks
00:00 -
Manipulate His Weight With Hooks
00:00 -
Create Distance With Hooks
00:00 -
The Butterfly Sweep
00:00 -
Butterfly Sweep — Key Details
00:00 -
Arm Drag From Butterfly
00:00 -
The Push Sweep
04:14 -
Take The Back From Butterfly
02:43 -
Kata Gatame From Butterfly
02:30 -
The Waist Crush
02:15 -
The Shoulder Crush
03:12 -
Shoulder Crush Sweep
03:09 -
Shoulder Crush Reverse Sweep
03:06 -
Shoulder Crush To Triangle
02:44 -
Arm Control Hook Sweep
03:44 -
The Arm Twist
00:00 -
Arm Trap To Kimura Lock
00:00 -
Arm Trap Variation
00:00 -
Lapel Hook Sweep
00:00 -
Lapel Back Take
00:00 -
Reversal Hook Sweep
03:27 -
Butterfly Guard To X-Guard
02:57 -
Hooks Control Drill
02:44 -
Hooks Sweep With Momentum
03:01 -
Beat The Leg Weave vs Butterfly
01:51 -
Butterfly Guard To Single-X
02:09 -
Trapped Knee Shield To Hooks
00:00
Block 4B — Butterfly Guard Full Class
Full classes on the butterfly guard: passing, offensive game and hook guard against a bigger opponent.
-
Passing The Butterfly Guard
00:00 -
Dynamic Butterfly Passing
14:24 -
Understanding The Butterfly Guard
20:07 -
Offensive Butterfly Guard
10:52 -
Mastering Hook Guard — Full Class 1
15:25 -
Hook Seated Guard — Full Class 2
13:49 -
Hook Guard vs Bigger Opponent — Full Class 3
15:53 -
Hook Guard vs Bigger Opponent — Full Class 4
17:58 -
Belt Test – Butterfly Guard
Block 5A — Side Position Curriculum (Concepts)
The 29 side control concepts (100 kilos): escapes, hip and shoulder control, and attacks (americana, kimura, kesa gatame, chokes).
-
Side Control Escapes — Start Here
00:00 -
Escape Side Control — Recover Guard Or Submit
04:11 -
The Underhook Escape From Side Control
04:14 -
The Underhook Spinning Escape
03:28 -
Escape Kesa Gatame (Scarf Hold)
03:19 -
Escape North-South
00:00 -
Escape The Headlock
02:13 -
Inside Turtle Position — Stay Safe
04:54 -
Attacking The Turtle
03:59 -
Outside Turtle Position
03:47 -
Control The Hips From Side Control
05:15 -
Understanding Hip Control
03:15 -
Shoulder Control From Side Control
02:32 -
Full Control From Side Control
03:41 -
Side Control To Mount — The Transition
02:36 -
The Americana From Side Control
04:09 -
Three Arm Attacks From Side Control
04:54 -
Attacking From Kesa Gatame
02:51 -
The Sandwich Armlock
03:13 -
Two Submissions From Kesa Gatame
02:54 -
The Paper Cut Choke
02:28 -
The Kimura From Side Control
00:00 -
Armlock To Kimura — The Combo
03:03 -
Canto Choke vs Baseball Choke
04:00 -
The Lapel Choke From Side Control
03:04 -
Finishing The Armbar From Side Control
03:50 -
How To Improve Your Side Control
06:30 -
Top Spinning Control
06:32 -
Top Spinning — Move Faster
00:46
Block 5B — Side Position Full Class
Full classes on side control: escapes, belly-down escapes, pressure and attacks.
-
Side Control Escapes — Full Class 1
22:51 -
Escape Side Control — Full Class 2
06:43 -
Escape Directions — Full Class 3
15:16 -
Control & Attack From Side — Full Class 4
14:45 -
Mastering Side Escapes — Full Class 1
16:13 -
Belly Down Escapes — Full Class 2
10:32 -
Pressure Side Control — Full Class 3
13:56 -
Side Control & Attacks — Full Class 4
00:00 -
Belt Test – Side Control
Block 6A — Mount Curriculum (Concepts)
The 26 mount concepts: escapes (elbow escape, bridge, high mount) and attacks (armbar, kata gatame, chokes, S-mount).
-
Escape The Mount — Stop Getting Crushed
00:00 -
Mount Defense — Survive The Top Pressure
00:00 -
Stop The Mount — Take The Back Instead
04:08 -
Fish The Leg — Escape The Mount
02:47 -
The Elbow Escape — Mount’s #1 Escape
00:00 -
Recover Guard From Under Mount
02:56 -
The Pump Escape From Mount
04:11 -
Mount Escapes — Your Full Toolkit
02:37 -
The Bridge Escape (Upa) From Mount
06:46 -
Bridge Escape — Every Variation
03:39 -
Escape The High Mount
02:47 -
The Macarena — Escape The Armbar
00:00 -
Escape The Armbar From Mount
02:51 -
Mount Attacks — Start Here
04:02 -
Side Control To High Mount
02:54 -
Side To Mount — Straight To Armbar
03:29 -
Kata Gatame From Mount
04:33 -
The Bow & Arrow Choke From Mount
04:26 -
The Ezequiel Choke From Mount
03:16 -
The Americana From Mount
04:29 -
How To Climb To High Mount
03:18 -
The Goals Of The Mount
02:38 -
Kata Gatame — The Mount Finish
05:30 -
S-Mount — The Progression Attack
00:00 -
The S-Mount Study
00:00 -
S-Mount — The Double Attack
00:00
Block 6B — Mount Full Class
Full classes on the mount: prevention, escapes, attacks and high/S-mount.
-
Mastering Mount Prevention — Full Class #1
09:58 -
Mastering Mount Escapes — Full Class #2
00:00 -
Mastering Mount Attacks — Full Class #3
15:08 -
High Mount & S-Mount — Full Class #4
14:32 -
Belt Test – Mount
Block 7A — Back Curriculum (Concepts)
The 23 back-control concepts: back transitions, control (seat belt, straitjacket), submissions and escapes.
-
Back Control — Master The Most Dominant Position
05:51 -
Back Attacks — Finish From The Back
03:27 -
Mount To Back — Take It When He Turns
04:53 -
Mount To Back — The Transition Drill
00:00 -
Take The Back From Side Control
00:00 -
Keep The Back — Follow His Hips
05:07 -
Leg Drag Straight To The Back
06:30 -
Take The Back From Side — Step By Step
03:07 -
Spin To The Back From Top
02:47 -
Connect The Leg Drag To The Back
03:41 -
Take The Back From Turtle
04:03 -
Attack The Turtle — Break It Open
04:23 -
Follow The Hips, Keep The Back
04:00 -
Back Control — The Core Concept
06:11 -
Straitjacket — Win The Hand Fight
06:06 -
Seat Belt — Dominate The Back
04:32 -
Finish The Back Before He Escapes
03:19 -
Escape The Back — The Core Escape
04:37 -
Improve Your Back Escape
05:06 -
Escape Before The Choke Lands
07:26 -
The Last-Chance Back Escape
02:57 -
Escape The Back To Turtle
03:09 -
Escape The Body Triangle
03:09
Block 7B — Back Full Class
Full classes on back control: control, turtle attacks, escape system.
-
Mastering Back Position — Full Class #1
12:30 -
Back & Turtle Attacks — Full Class #2
12:46 -
Turtle Position System — Full Class #3
12:05 -
Back Escapes — Full Class #4
13:37 -
Mastering Back Escape — Full Class #1
00:00 -
Back Escape System — Full Class #2
12:58 -
Mastering Back Control — Full Class #3
19:33 -
Mastering Back Attacks — Full Class #4
10:18 -
Belt Test – Back
Block 8A — Top Half Guard Curriculum (Concepts)
The 25 top half guard concepts: control, pressure, passes, kata gatame, kimura, deep half and back take.
-
Half Guard — When To Actually Use It
00:00 -
Leg Weave Pass — Smash The Half Guard
00:00 -
Top Half Guard — The First Step To Pass
05:54 -
Top Half Guard Control — Lock It Down
03:14 -
Half Guard — Perfect Your Passing Timing
03:54 -
Shoulder Pressure — Crush From Top Half
03:39 -
Kata Gatame — Finish From Top Half
02:53 -
Long Step — The Half Guard Pressure Pass
05:06 -
Lapel Kata Gatame — Trap & Choke
03:26 -
Bravo Choke — Sneaky Finish From Top Half
03:49 -
Underhook Pass — Beat The Half Guard
05:15 -
Reverse Half Guard — The Pass Nobody Sees
04:58 -
Reverse X vs Regular Half — Know The Difference
04:08 -
Top Half Guard Mastery — Full Review
03:32 -
Double Underhook — High-Percentage Pass
03:50 -
Same-Side Kata Gatame — Top Half Finish
04:00 -
Take The Back — Straight From Top Half
03:49 -
Deep Half Guard — How To Pass It
03:08 -
Guillotine — Punish The Deep Half Guard
04:08 -
Deep Half Defense — Survive The Guillotine
03:16 -
Kimura From Top Half — Lock The Arm
00:00 -
3 Kimura Variations — Top Half Guard
00:00 -
Kimura Grip — Take The Back
00:00 -
Floating Pass — Stay Light On Half Guard
04:11 -
Berimbolo — From Top Half Guard
03:25
Block 8B — Top Half Guard Full Class
Full classes on the top half guard: passing, top half and reverse half.
-
Mastering Half Guard Passing — Full Class #1
12:23 -
Mastering Top Half Guard — Full Class #2
12:20 -
Reverse Half Guard System — Full Class #3
10:17 -
Belt Test – Half Guard Top
Block 9A — Bottom Half Guard Curriculum (Concepts)
The 25 bottom half guard concepts: hook sweeps, deep half, sweeps, reverse DLR, hybrid guard and escapes.
-
Bottom Half Guard — Stop Getting Smashed
00:00 -
Escape Half Guard — Recover Full Guard
00:00 -
Half Guard Hook Sweep — Off-Balance Him
00:00 -
Control His Weight — Half Guard Hook Game
00:00 -
Beat Shoulder Pressure — Bottom Half
00:00 -
Shoulder Crunch — Sweep From Bottom Half
00:00 -
The Diamond Half Guard — Lock Him Down
00:00 -
Enter The Deep Half Guard — Step One
00:00 -
Deep Half Single Leg — The Core Sweep
00:00 -
Attack The Single Leg — Deep Half
00:00 -
Lapel Deep Half Guard — Trap & Sweep
00:00 -
The Deep Half Guard Sweep — Put Him Over
00:00 -
Pull Half Guard The Right Way
00:00 -
Reverse Half Guard Sweeps — Flip The Script
00:00 -
Pulling Half Guard — Lapel Control
00:00 -
Diving Half Guard Sweeps — Get Underneath
04:21 -
Half Guard Scissor Sweep — Classic & Clean
03:20 -
Take The Back From Half Guard — Review
03:17 -
The Shaolin Sweep — Half Guard
03:25 -
Reverse De La Riva — The Concepts
05:25 -
Reverse De La Riva Sweep — Off The Hook
03:04 -
Beijo Do Dragão — The Dragon Sweep
02:53 -
Hybrid Guard — Half, RDLR & Lasso
02:29 -
Hybrid Guard — RDLR & Lasso Sweeps
02:55 -
Stop The Knee Cut — Counter To Single Leg
03:34
Block 9B — Bottom Half Guard Full Class
Full classes on the bottom half guard: deep half, John Wayne sweep and mastering the deep half.
-
Deep Half Guard — Full Class #1
11:47 -
Mastering Half Guard — Full Class #2
14:10 -
Deep Half Guard System — Full Class #3
16:50 -
Mastering Deep Half Guard — Full Class #4
13:56 -
John Wayne Sweep Variations — Full Class #5
10:00 -
Belt Test – Half Guard Bottom
Block 10A — Spider Guard Curriculum (Concepts)
The 30 spider guard concepts: omoplata, triangle, sweeps, 50/50, X-guard, lasso and passes.
-
Spider Guard — Master The Open Guard | Spider Guard #1
00:00 -
Triangle Choke From Spider Guard | Spider Guard #2
00:00 -
Omoplata From Spider Guard — Lock The Shoulder | Spider Guard #3
03:08 -
The Perfect Omoplata — Finish Every Time | Spider Guard #4
05:14 -
Spider Guard Pendulum Sweep | Spider Guard #5
02:46 -
Spider Guard Frame Sweep — Off-Balance Him | Spider Guard #6
03:24 -
Spider Guard Spinning Sweep | Spider Guard #7
03:37 -
Triangle The Standing Passer | Spider Guard #8
03:48 -
Omoplata — Three Ways To Attack | Spider Guard #9
04:43 -
Spider Guard Classic Sweep | Spider Guard #10
02:49 -
Spinning Sweep To Back Take | Spider Guard #11
02:36 -
Spider Guard vs Lasso — Know The Difference | Spider Guard #12
05:44 -
Sweep The Knee-On-Belly | Spider Guard #13
03:25 -
The 50/50 Guard — Control The Stalemate | Spider Guard #14
04:11 -
50/50 Back Take — Steal His Back | Spider Guard #15
04:18 -
How To Pass The 50/50 Guard | Spider Guard #16
03:54 -
Lasso Hook Sweep — Tip Him Over | Spider Guard #17
02:25 -
The Meregali Sweep | Spider Guard #18
04:51 -
X-Guard Scissor Sweep | Spider Guard #19
03:14 -
X-Guard To Spider Guard Sweep | Spider Guard #20
02:43 -
X-Guard — Taking Out The Trash Sweep | Spider Guard #21
03:29 -
X-Guard — Kuzushi & Weight Control | Spider Guard #22
02:42 -
Pass Spider Guard — Back & Forth | Spider Guard #23
03:46 -
Pass Spider Guard — Side To Side | Spider Guard #24
04:21 -
Pass Spider Guard — Straight To Armbar | Spider Guard #25
03:58 -
Pass Spider Guard — Change Levels | Spider Guard #26
05:22 -
Foot Stamp Pass — Beat Spider Guard | Spider Guard #27
04:10 -
Escape The Lasso Early | Spider Guard #28
03:26 -
Lasso Escape To Ankle Lock | Spider Guard #29
05:02 -
How To Pass The Lasso Guard | Spider Guard #30
05:00
Block 10B — Spider Guard Full Class
Full classes on the spider guard: control, attacks and passing.
-
Mastering Spider Guard — Full Class #1
00:00 -
Mastering Spider Guard — Full Class #2
13:11 -
Mastering Spider Guard — Full Class #3
19:35 -
Passing The Spider Guard — Full Class #4
17:22 -
Belt Test – Spider Guard
Block 11A — De la Riva Curriculum (Concepts)
The 24 De la Riva concepts: X-De la Riva, sit-up guard, single-X, submissions, berimbolo and back take.
-
De La Riva Guard — Master The Hook
00:00 -
X-Sweep From De La Riva
05:25 -
Baby Bolo From X De La Riva
04:06 -
The Balloon Sweep — De La Riva
03:32 -
Master The X De La Riva Guard
04:17 -
X De La Riva Combination Attacks
04:47 -
Kuzushi — Break His Balance In De La Riva
07:42 -
The Uncle Pick Sweep — De La Riva
05:18 -
Sit-Up Guard — Shin To Shin Sweep
04:30 -
Sit-Up Guard — Attack Variations
09:16 -
Tomoe Nage Straight To Armbar
02:56 -
The Right Kuzushi Makes The Sweep
03:54 -
X-Guard From De La Riva
04:34 -
The Single-X Guard
06:02 -
Single-X Straight Ankle Lock
03:54 -
X-Guard vs Single-X — Know The Difference
03:55 -
Triangle Choke From De La Riva
02:45 -
Armlock From De La Riva
04:19 -
Kuzushi — Set Up Your Submissions
03:26 -
Baby Bolo — The Kuzushi Details
04:54 -
Berimbolo Straight To Mount
04:34 -
The Basic Berimbolo Back Take
04:25 -
Berimbolo To Leg Drag
03:32 -
De La Riva Concepts — Full Review
00:00
Block 11B — De la Riva Full Class
Full classes on the De la Riva: control, deep DLR and passing.
-
Mastering De La Riva — Full Class #1
21:08 -
Deep De La Riva Guard — Full Class #2
11:23 -
Passing De La Riva — Full Class #3
18:42 -
Fundamentals To Pass De La Riva — Full Class #4
00:00 -
Belt Test – De la Riva
Block 12 — Guard Connections (Full System)
The 21 guard-connection concepts: pass defense, kuzushi, hip theory and how to keep your guard against pressure.
-
Connect Your Guards — Never Get Passed
00:00 -
Shut Down The Pressure Pass
03:35 -
Defend The Standing Pass
05:16 -
Upper Body vs Lower Body Control
05:24 -
Stop The Toreando Pass
04:21 -
Sitting Guard — Your First Connection
04:27 -
Diamond Guard — The Safe Connection
04:39 -
The Mindset For Connected Guards
03:13 -
Keep Your Guard Connected
03:50 -
Knee Cut vs Reverse DLR
08:34 -
Kuzushi For The X-Guard
03:27 -
Train Your Guard Connections Smart
02:55 -
Concept Training For Connected Guards
00:00 -
Defend The Pressure Pass
00:00 -
Beat The Pressure Pass With Kuzushi
00:00 -
Kuzushi Against The Pressure Pass
04:16 -
How To Deal With Pressure Passing
08:52 -
Escape The Knee Trap
04:21 -
The Hips Theory — Guard Connections
09:54 -
The Theory Of Guard Connections
13:08 -
Dealing With The Pressure Pass — Full Class
13:11 -
Belt Test – Guard Connections
Bonus 1 — Seated Guard (Full Class)
Bonus content: full classes on the seated guard and worm guard — attacks and passes.
-
Mastering The Seated Guard — Full Class 1
21:04 -
Mastering The Worm Guard — Full Class 2
17:24 -
Passing The Seated Guard — Full Class 3
17:34 -
Attack & Pass The Seated Guard — Full Class 4
18:20
Bonus 2 — Turtle Position (Full Class)
Bonus content: full classes on the turtle position — attacks and chokes.
-
Attacking The Turtle — Full Class 1
00:00 -
Chokes Against The Turtle — Full Class 2
14:21 -
How To Use The Turtle Position — Full Class 3
18:10 -
Turtle Position Attacks — Full Class 4
00:00
Master Class — Old School Pressure & Control
The Old School Pressure & Control seminar series — the full seminar replay, plus every technique broken out as its own lesson. This is a living module: it grows with each new seminar.
-
Full Seminar — Old School Pressure & Control (Replay)
50:25 -
L1 — What Pressure & Control Really Mean
06:13 -
L2 — Under-Over Pass to Half Guard
06:06 -
L3 — Shoulder Switch: When Frames Stop You
04:35 -
L4 — Double Unders: Get Under the Hips
02:29 -
L5 — Beating the Knee Shield
04:05 -
W1 — Let the Pressure Choose Your Guard Pass
11:40 -
W2 — Don’t Choose the Technique — Let Him Give It to You
06:24 -
W3 — Get to the Strong Position First — Then Pass
07:30 -
W4 — Frame Like a Sniper — Surviving the Pressure Pass
08:53 -
W5 — Realign, Then Attack — Turn Defense Into Offense
06:14 -
Full Seminar — Half Guard on Top (Replay)
55:09 -
L1 — Why Half Guard: Foot, Knee, Hips
04:15 -
L2 — Getting to the Half Guard — It’s All About the Knee
05:08 -
L3 — Put His Back on the Ground
03:53 -
L4 — Underhook + Cross Face: The Full Control
03:21 -
L5 — Take Your Knee Out
02:56 -
L6 — Cross Face Without the Underhook — and the Lapel
05:38 -
L7 — Underhook Without the Cross Face: One Line of Pressure
03:08 -
L8 — The Lapel Choke from Knee-Out Control
03:55 -
L9 — When He’s Faster: Going Reverse + Half Base
03:38 -
W1 — Getting to the Half Guard
10:01 -
W2 — The Map — Lines and Control
06:15 -
W3 — Underhook + Cross Face
03:31 -
W4 — When You Only Have ONE
14:05 -
W5 — The Alarm — Retreat Before You Lose It
06:30 -
W6 — Too Late — Getting the Knee Out
07:33 -
W7 — The Two Games
07:07 -
Full Seminar — Side Control & Mount (Replay)
24:43 -
L1 — The Pressure Mentality — Where Is Your Knee?
03:37 -
L2 — Knee on Belly: Control, Not a Pin
04:14 -
L3 — Following the Shrimp Into the Shoulder Line
04:11 -
L4 — Keeping Pressure While You Stay Mobile
04:58 -
L5 — Isolating the Arm — High Mount and S-Mount
04:01 -
L6 — Opening the Elbow to Attack
03:43 -
W1 — From the Pass to the Shoulder Line
07:51 -
W2 — Hips Line, Shoulder Line — Stretch Before You Attack
08:14 -
W3 — Kimura by Weight, Not by Grip
04:24 -
W4 — Opening the Elbow — Side, High Mount, Knee on Belly
04:50
Seminars
Every seminar Helio teaches in Okinawa, recorded in full. One complete replay per seminar, added as each one is taught.
-
Full Seminar — Pressure & Control (Replay)
50:25 -
Full Seminar — Half Guard on Top (Replay)
55:09 -
Full Seminar — Side Control & Mount (Replay)
24:43 -
Full Seminar — Half Guard Bottom: Octopus & Deep Half (Replay)
01:00:34 -
Full Seminar — Kimura Trap System (Replay)
34:00
Student Ratings & Reviews

No Review Yet